Hacking a beckoning cat
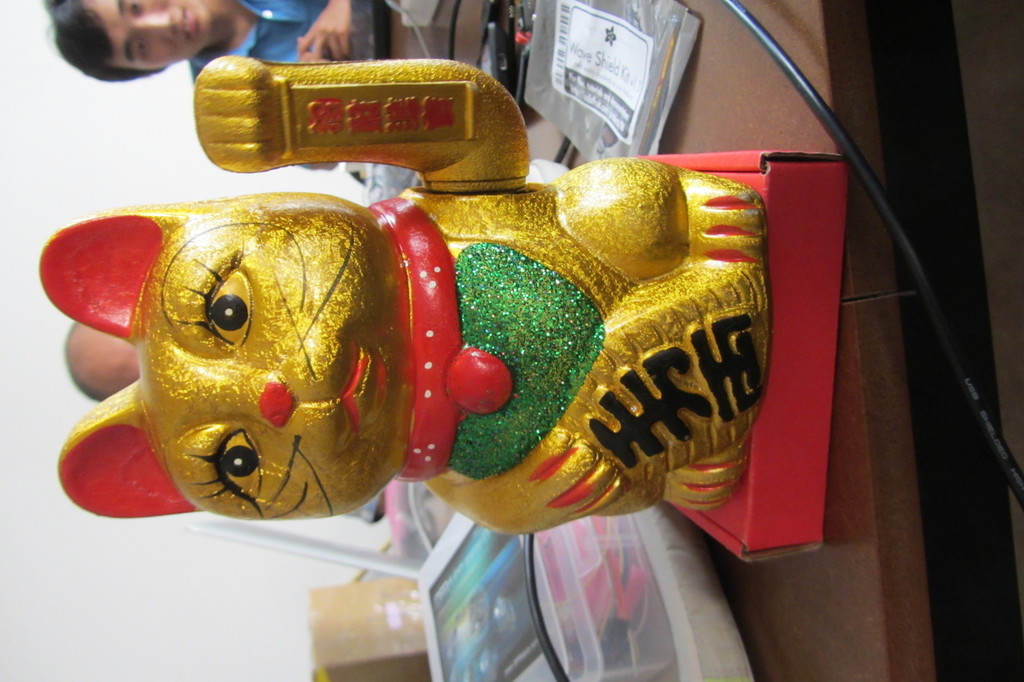
When walking through Shanghai, there is one thing you will see in many shops, restaurants and other places: the Maneki Neko, also known as the beckoning cat. Most of them have a mechanism in them, which lets one of their arms (usually the left one) move back and forth endlessly.
A while back, a few friends and me were joking about what people would do when all the sudden, instead of going back and forth, the cat's arm would start moving sideways. The idea had been stuck in my head ever since then, and now, we're about to find out. So, let's hack a beckoning cat.
Parts and Tools
In the process of hacking the cat, we used the follwing additional parts, most of which were kindly provided to us by Seeed Studio as part of their Toy Hacking Contest:
- 1 Arduino Uno
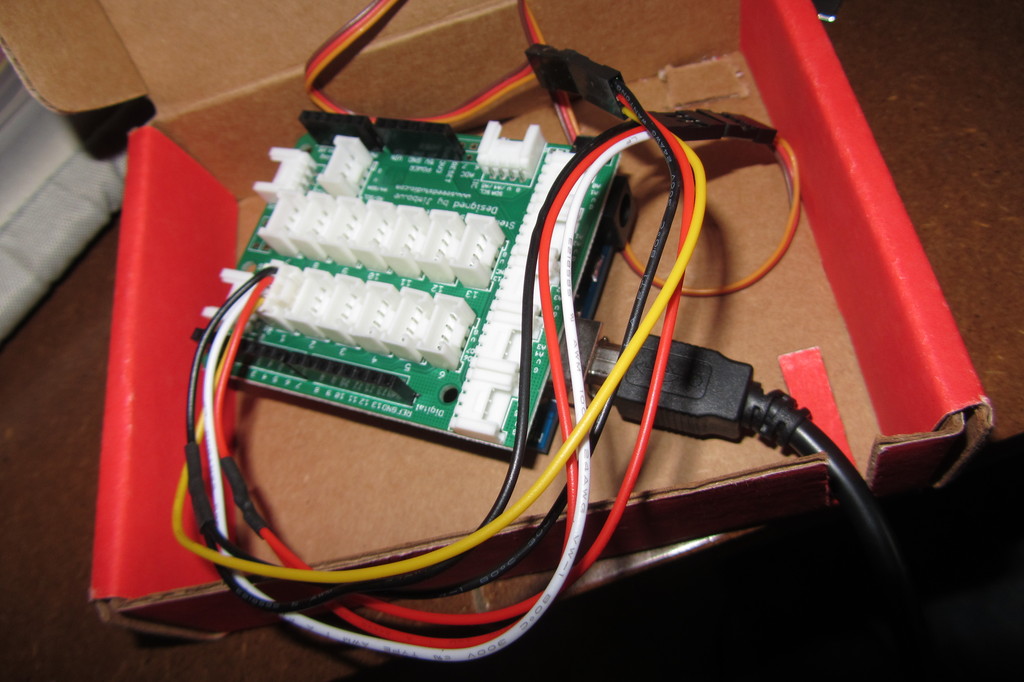
- 1 Stem Baseshield
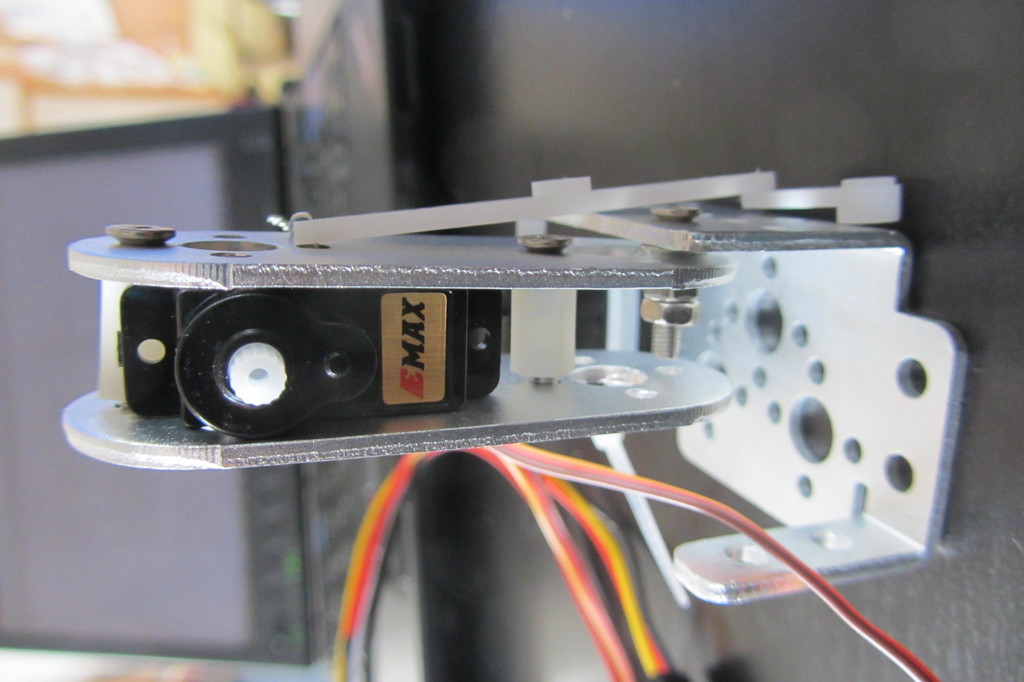
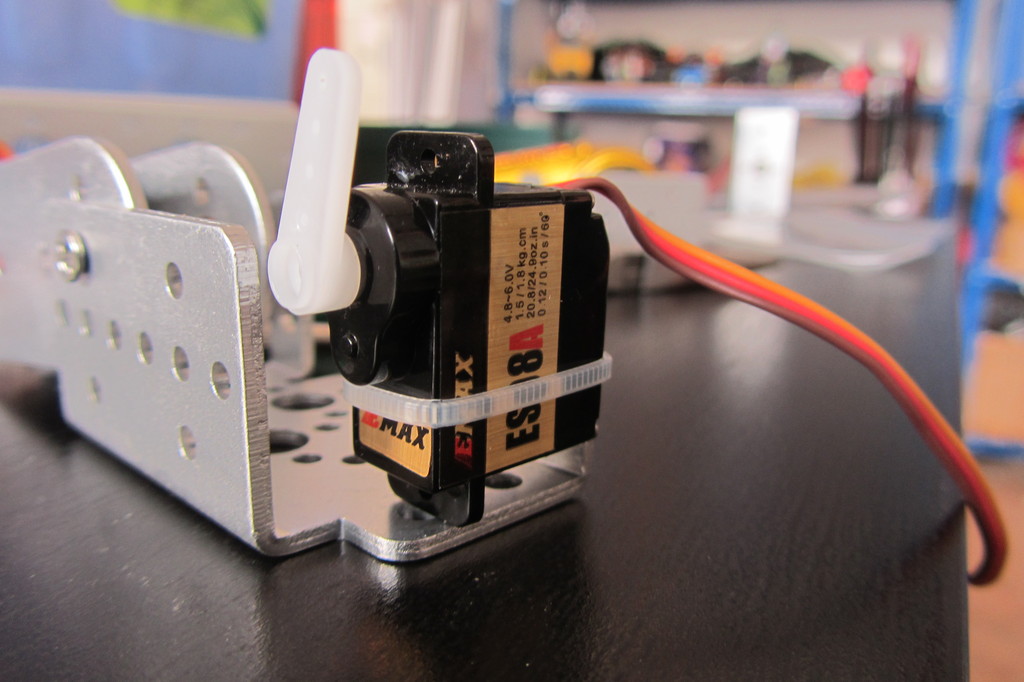
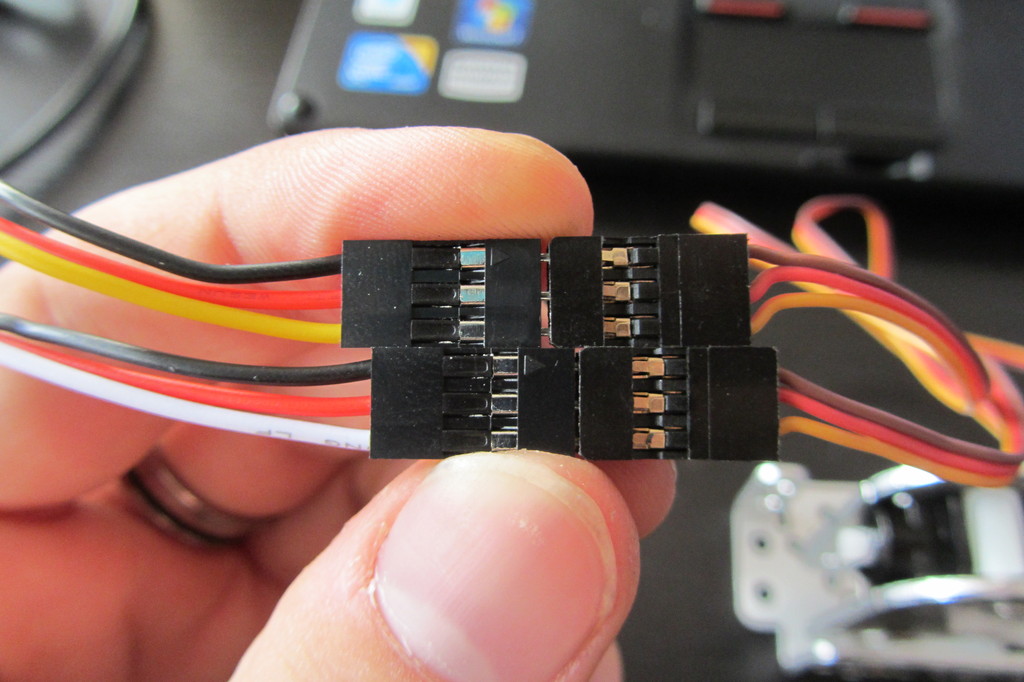
- 2 EMAX ES08A Servos
- 1 Grove X2 Servo cable
- A bunch of metal parts we had lying around
The following tools were used in the process:
- A hot air gun (or something similar, like a SMD rework station)
- A dremel
- A knife, screwdrivers, pliers, ...
Step 1 - Buying the cat
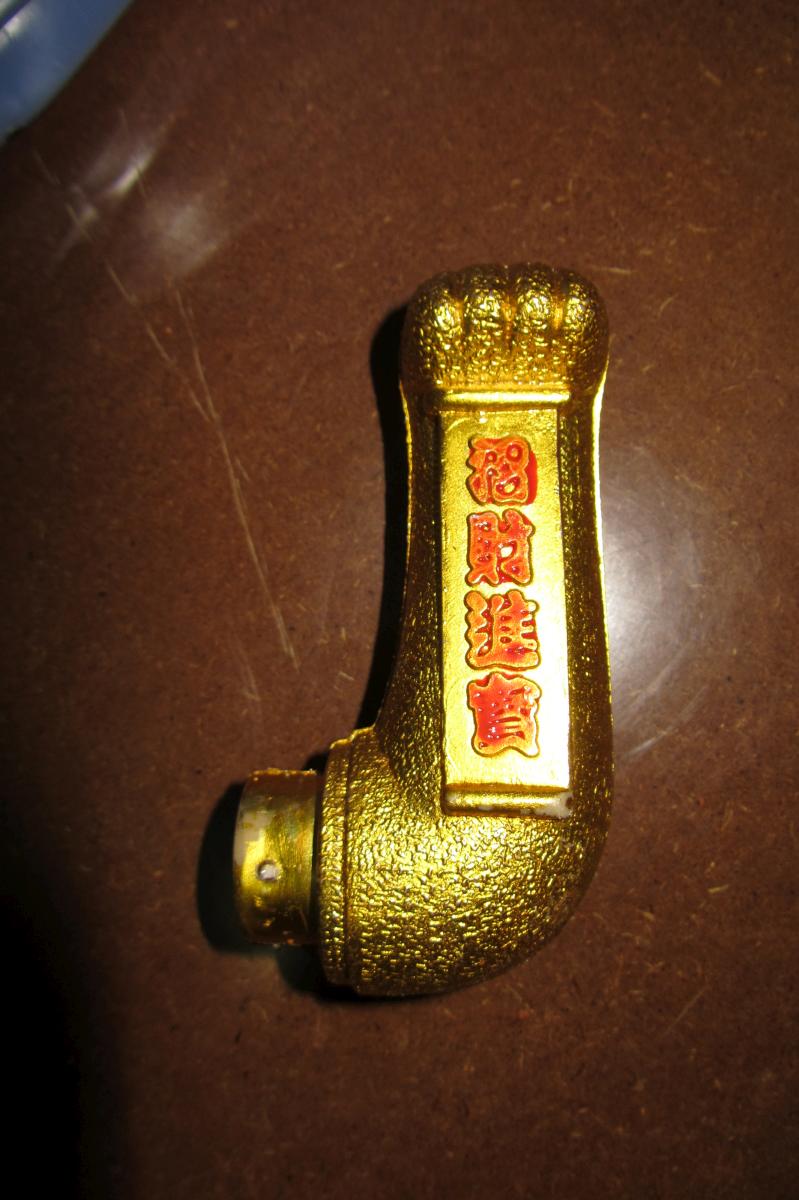
In order to hack a cat, one has to get one first. And that was a harder thing to do than one might have thought. Walking along East Nanjing Road one day after work, and later along all the small streets next to it, there was only one shop that seemed to have them. They were a little expensive (around 80 RMB), so I decided to keep looking. Two days later, after a visit in XinCheJian, Shanghai's hackerspace, I finally managed to get one in a small shop on Anhua Road, just a few hundered meters away from XinCheJian, for 50 RMB.
Other promising sources would be places like eBay, Taobao, etc.

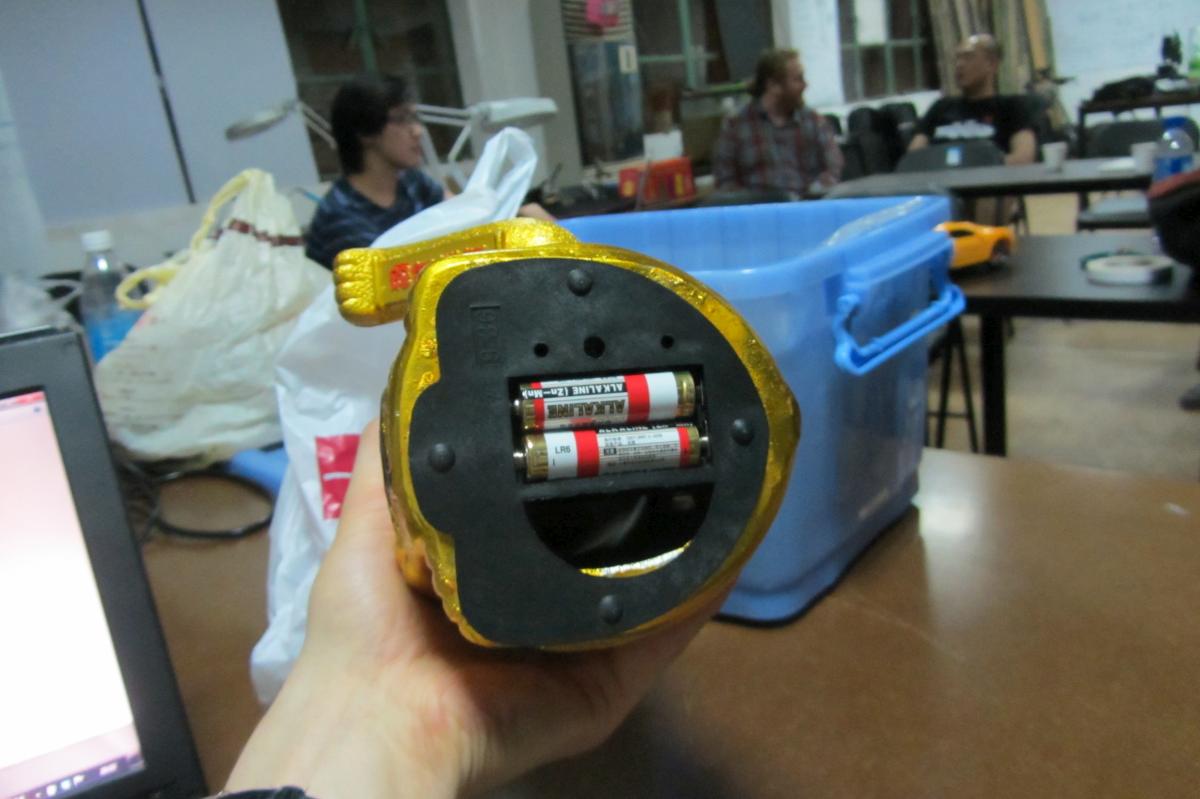
Step 2 - Taking it apart
On the bottom of the cat (which is made of some sort of ceramics), there is a battery holder made out of plastic. This is where the taking apart will start. The whole thing is glued to the body of the cat, and anything but easy to get off. Using a heat gun (or a hot air SMD rework station in our case, since we did not have a heat gun), you can soften the glue a little and then loosen the plastic part with a screwdriver. Be careful with the hot air, as the plastic might start to melt as well.
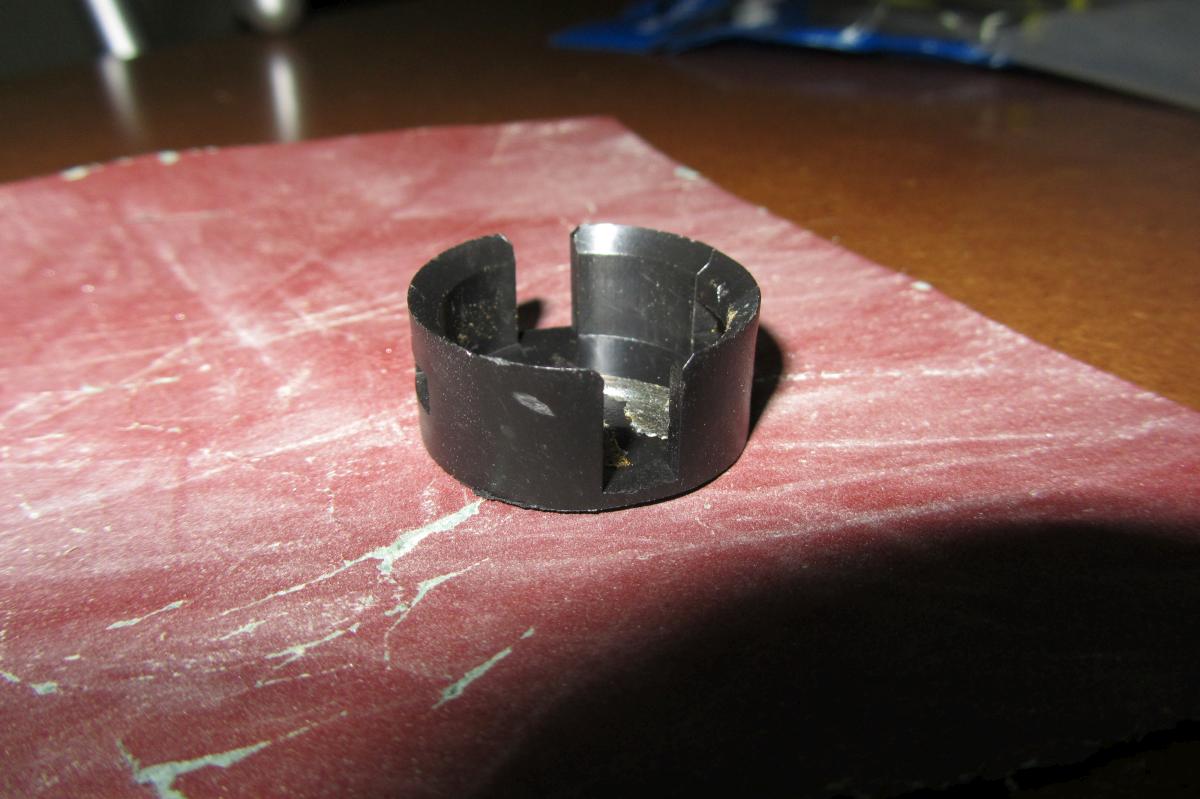
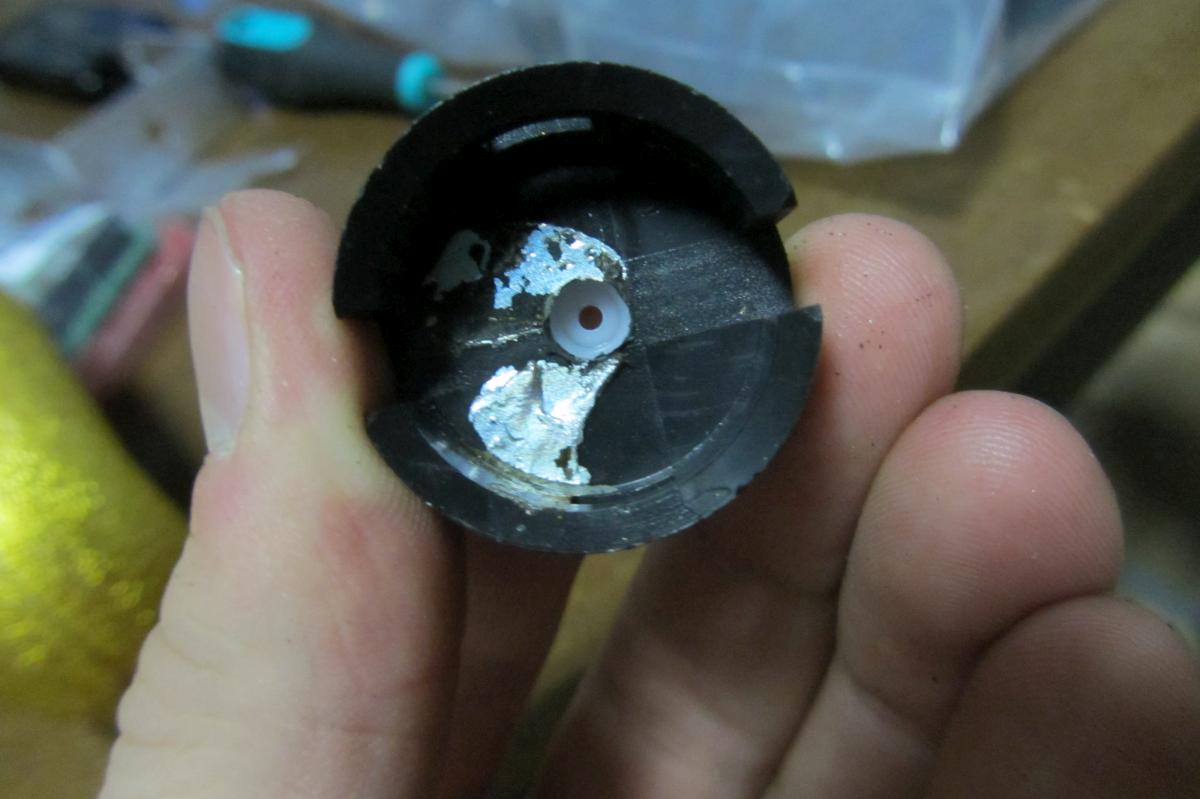
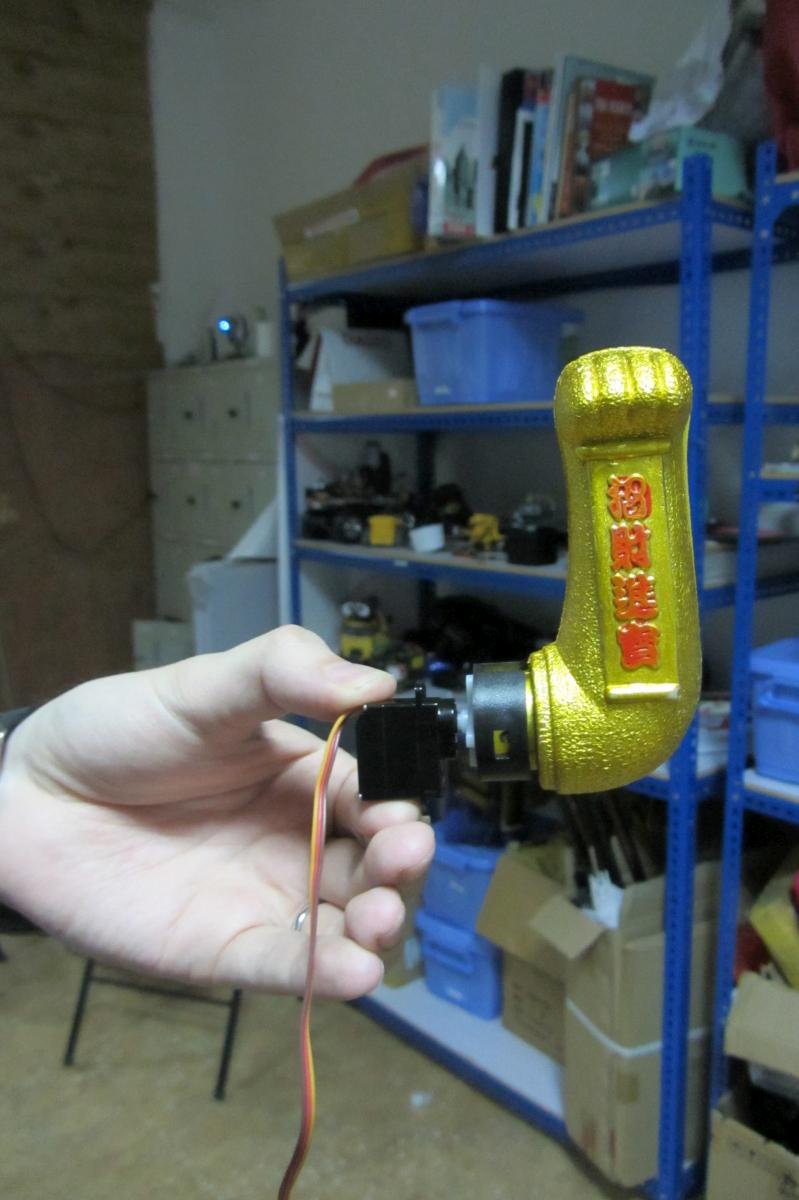
Once the plastic is separated from the body of the cat, you need to get the internal assembly out of the body. The arm, the swinging mechanism and the plastic base are all one unit, so it will take some turning and bending to get the thing out. However, since we are only going to use the arm, and its plastic mount, you might just brake off as much as you want to make this step easier for you.
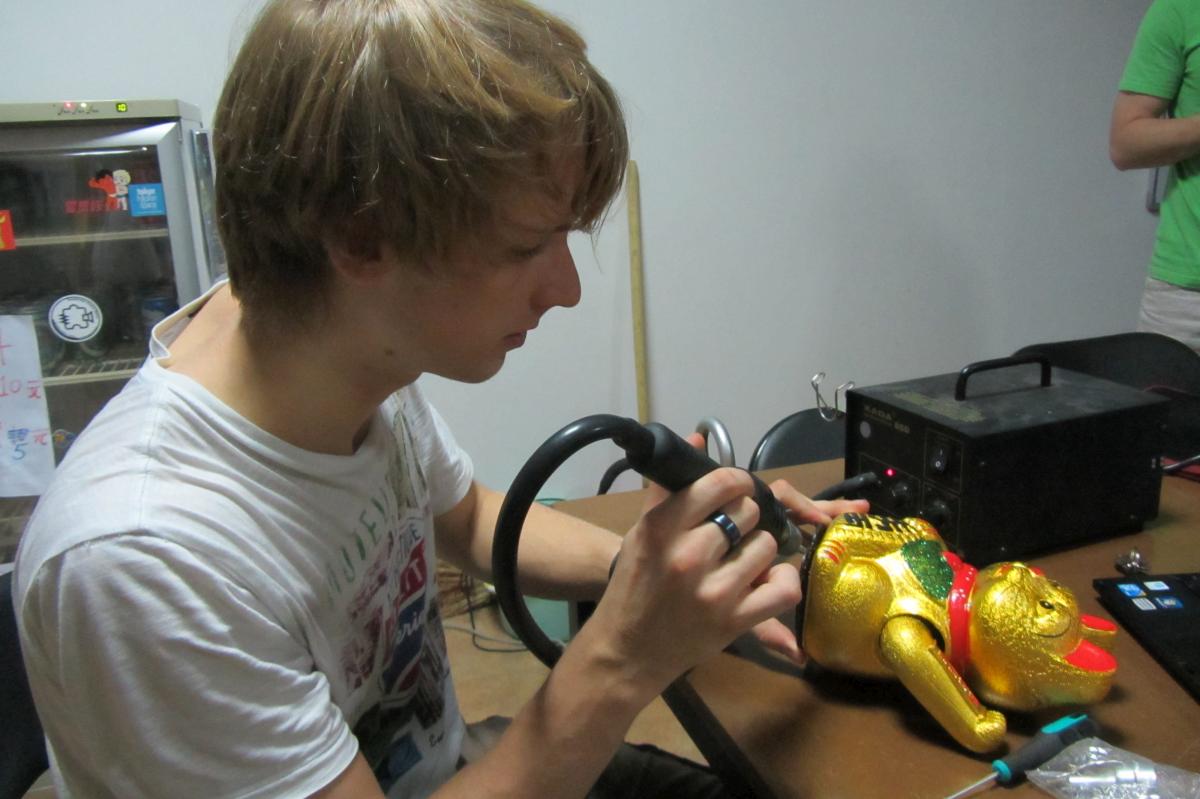
Step 3 - Making the mount for the arm
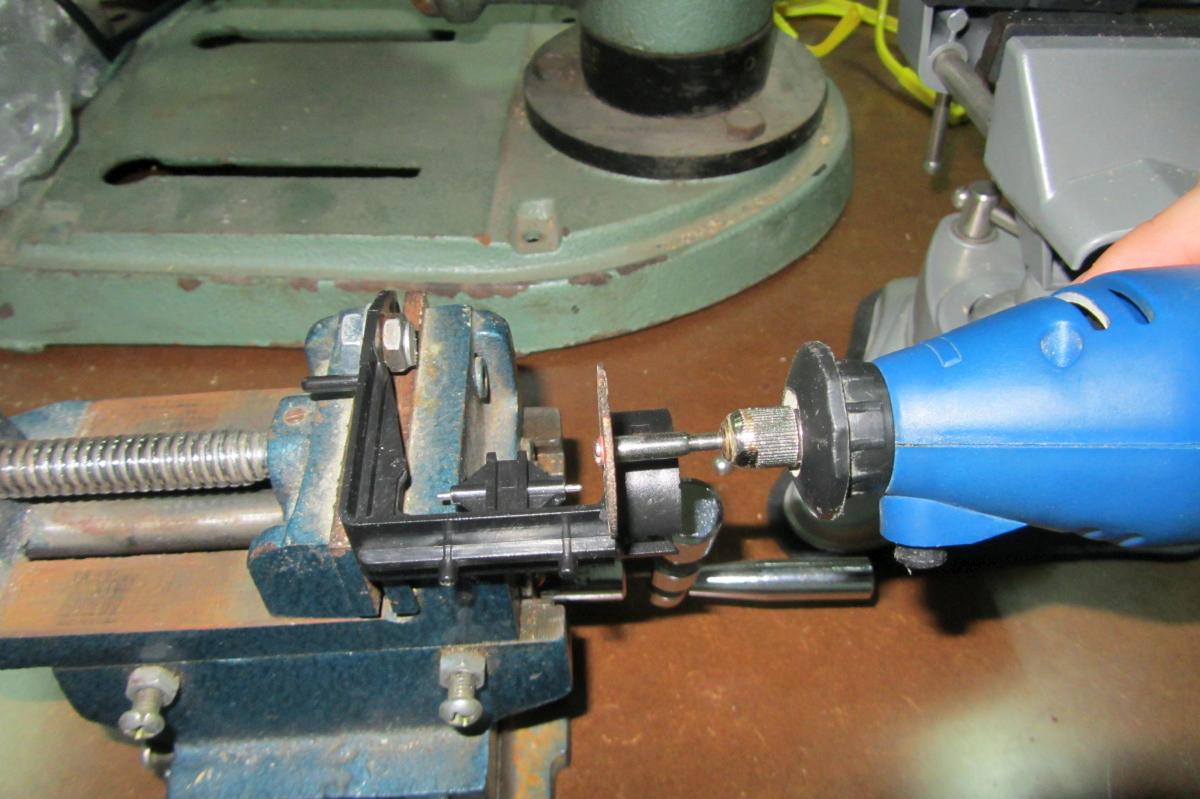
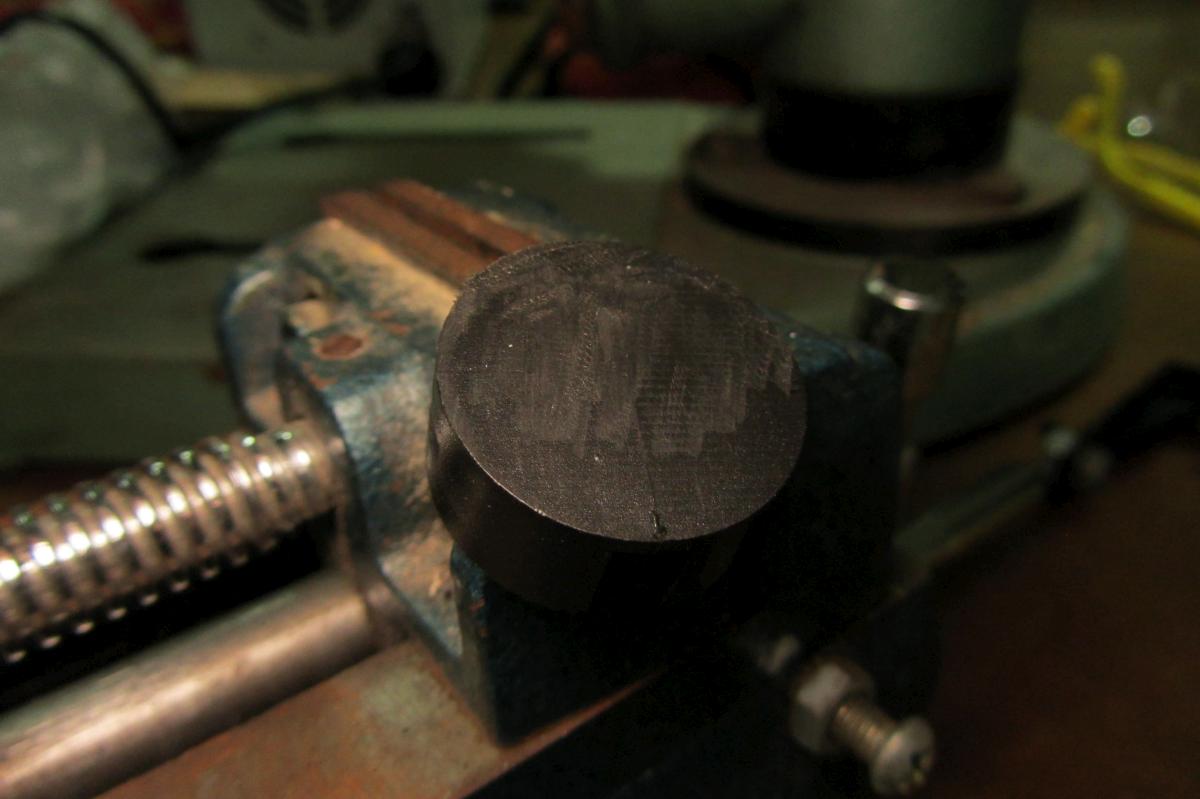
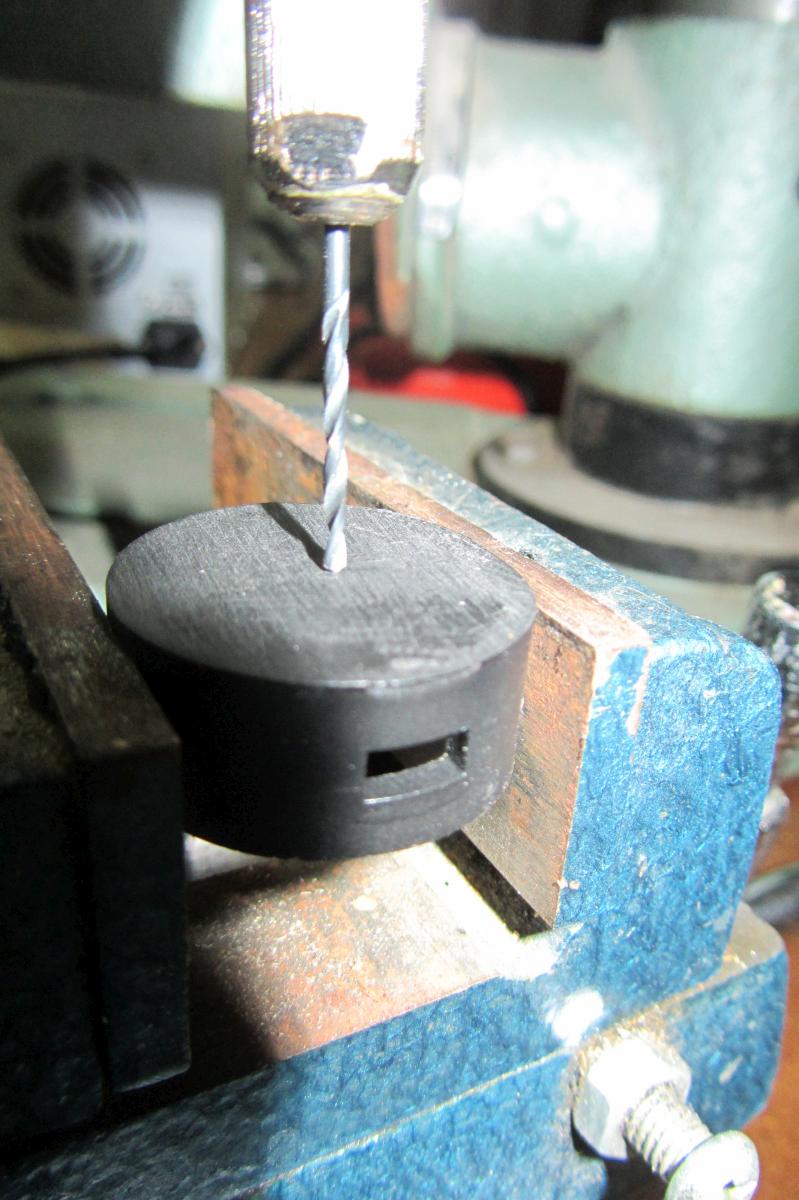
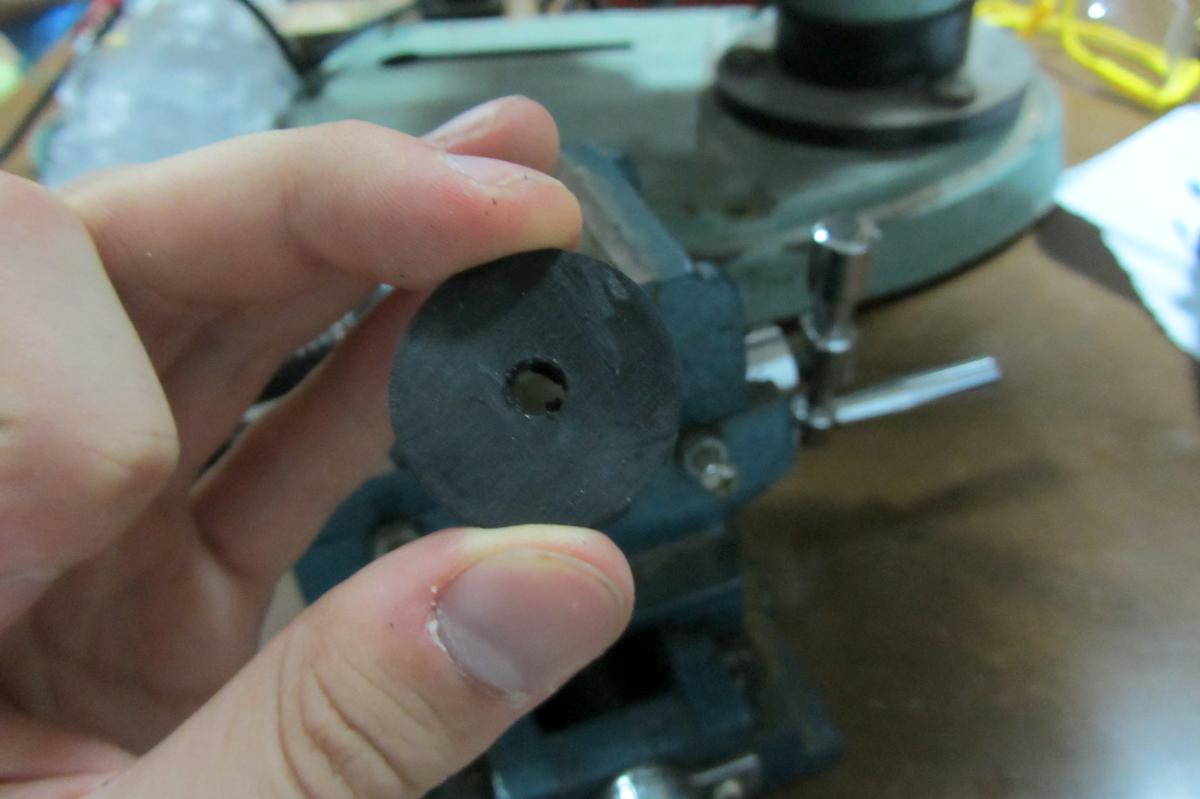
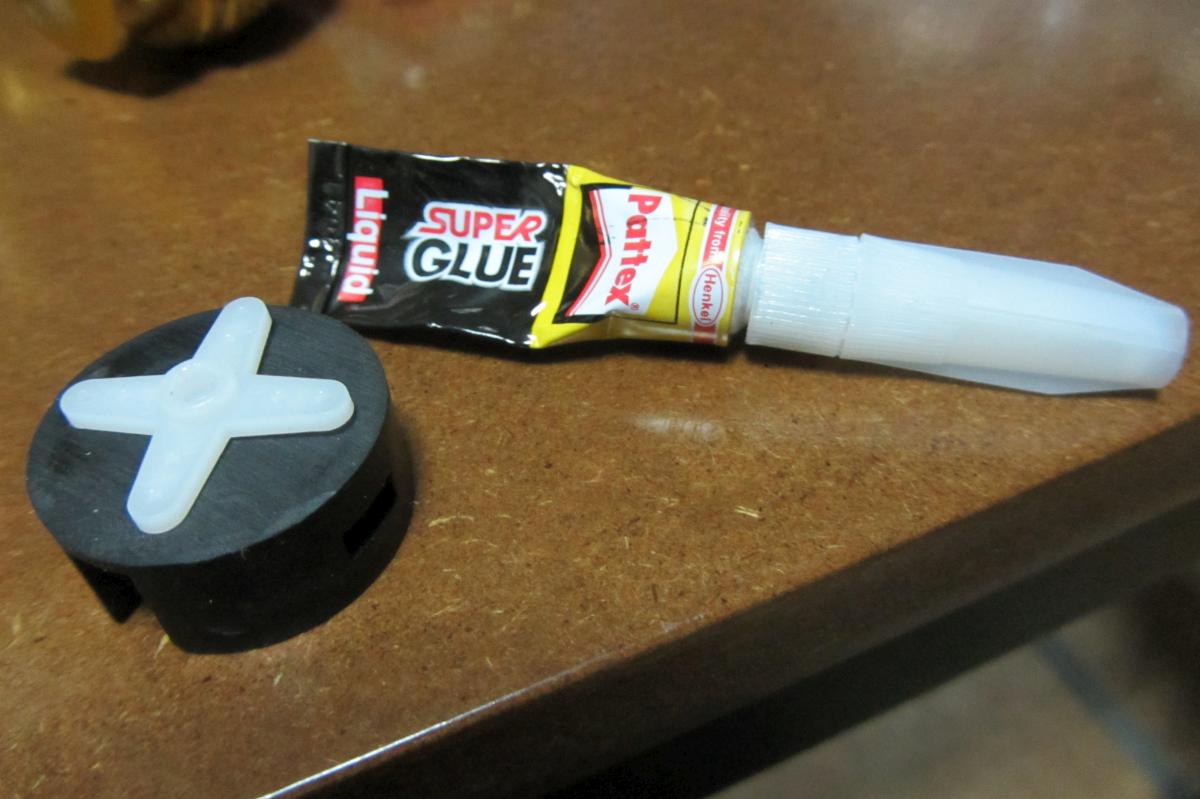
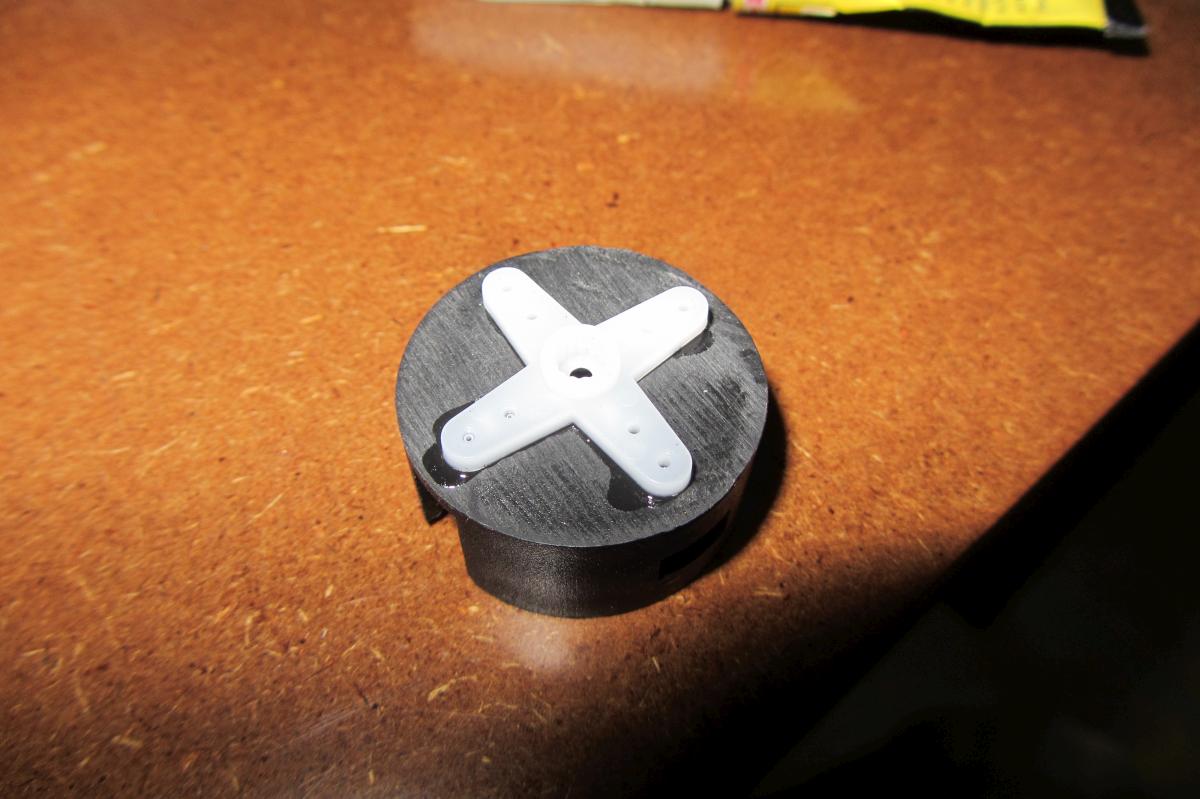
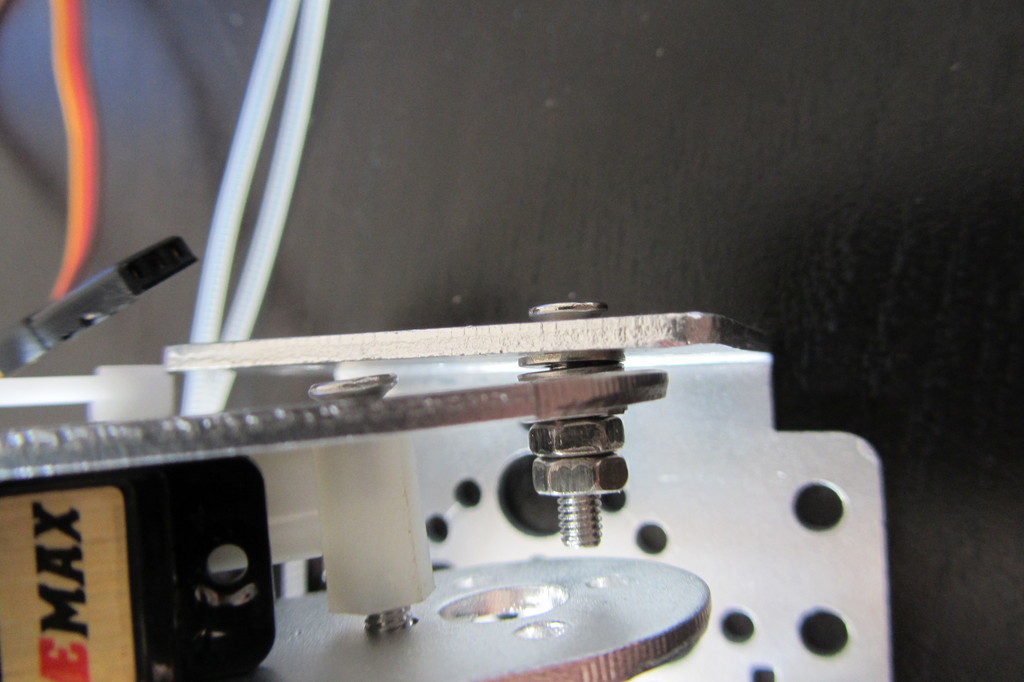
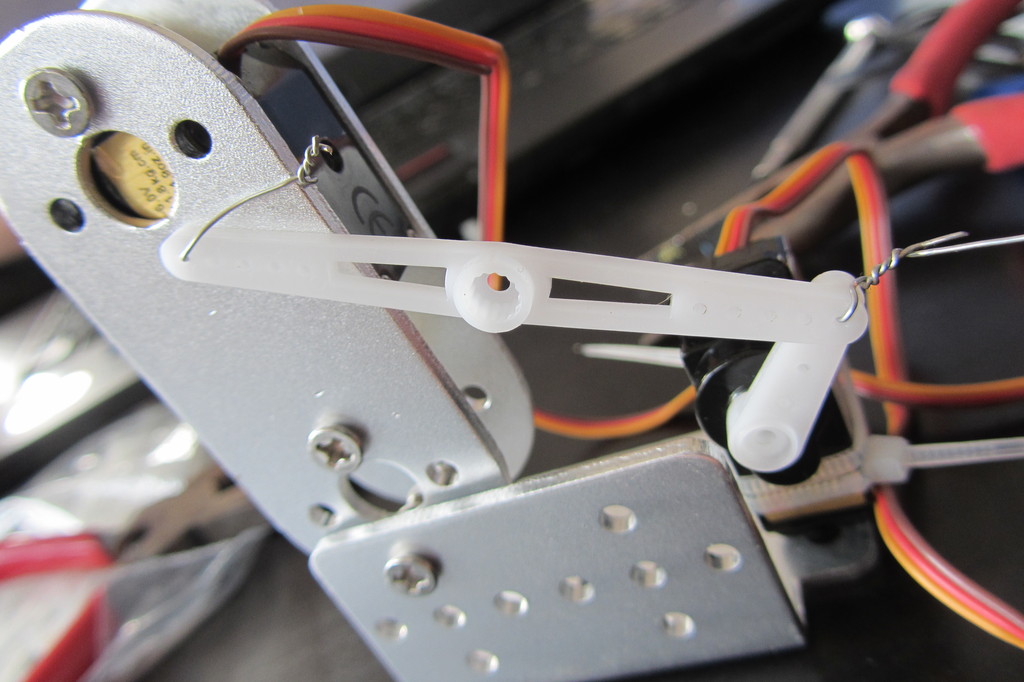
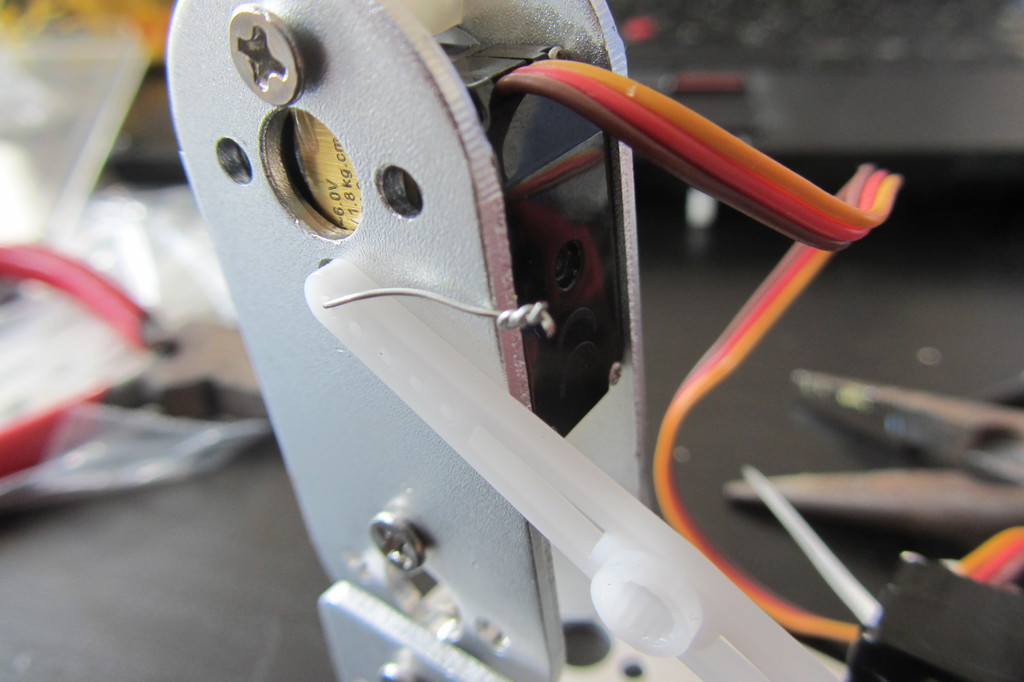
In the original design, the arm is mounted to the swinging mechanism using a snap mount. We will reuse this mount for our own mechanism. In order to do so, first get the arm out of the mount, and then get the mount off the rest of the assembly. I used a dremel for the job, but a sharp knife might do the job. Just don't hurt yourself. After cutting the mount of, use sandpaper to smooth the surface of the mount.
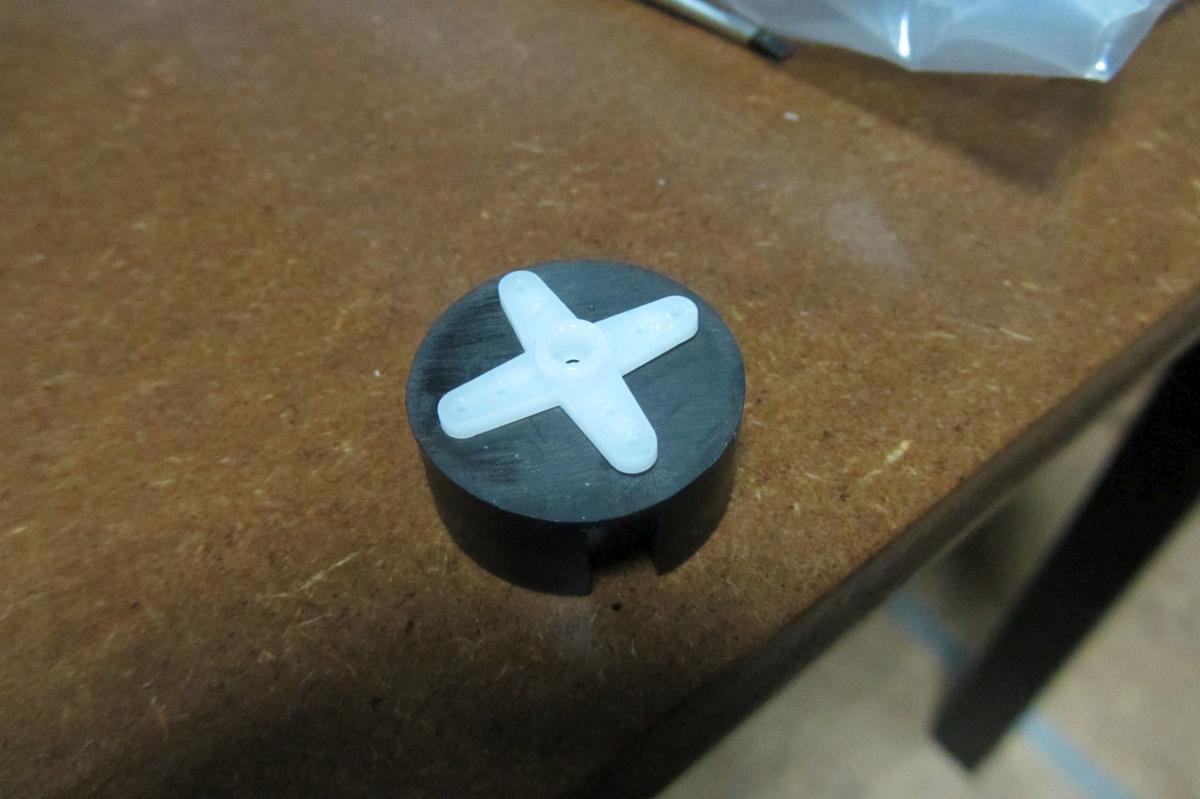
To connect the mount to the servo, we will glue the servo horn to the mount. But in order to still be able to fasten the servo horn to the servo with a screw, you need to drill a hole in the center of the mount. Make sure that the horn can lie flat on the surface of the mount. Now take some super glue, make a cross on the mount to accomodate for the 4 arms of the horn, and press the horn into the glue. Let that dry.
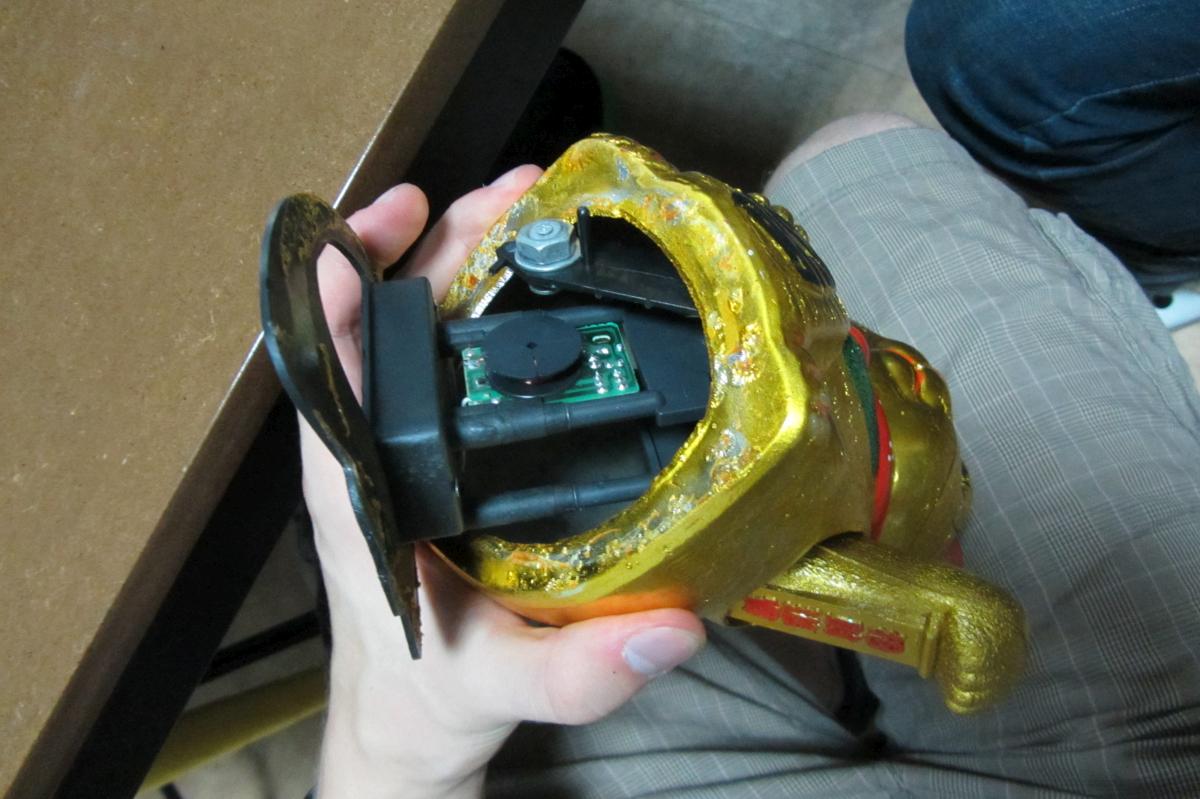
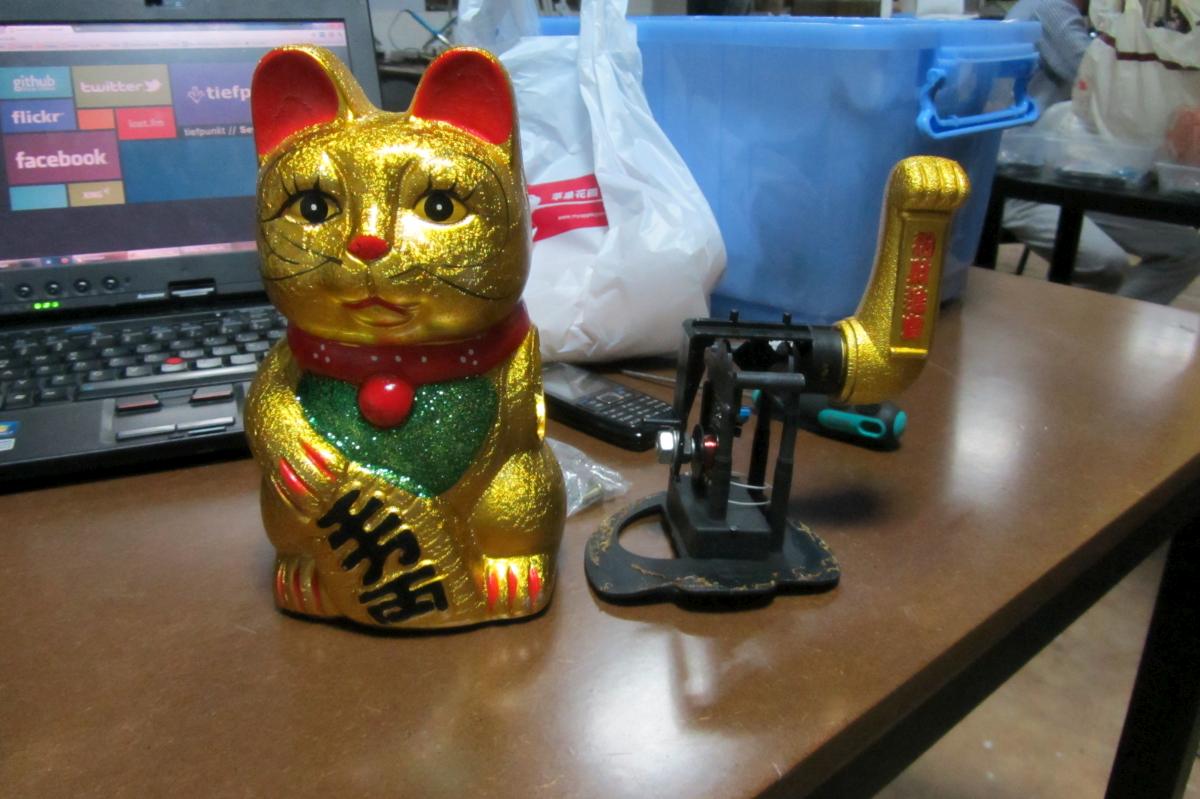
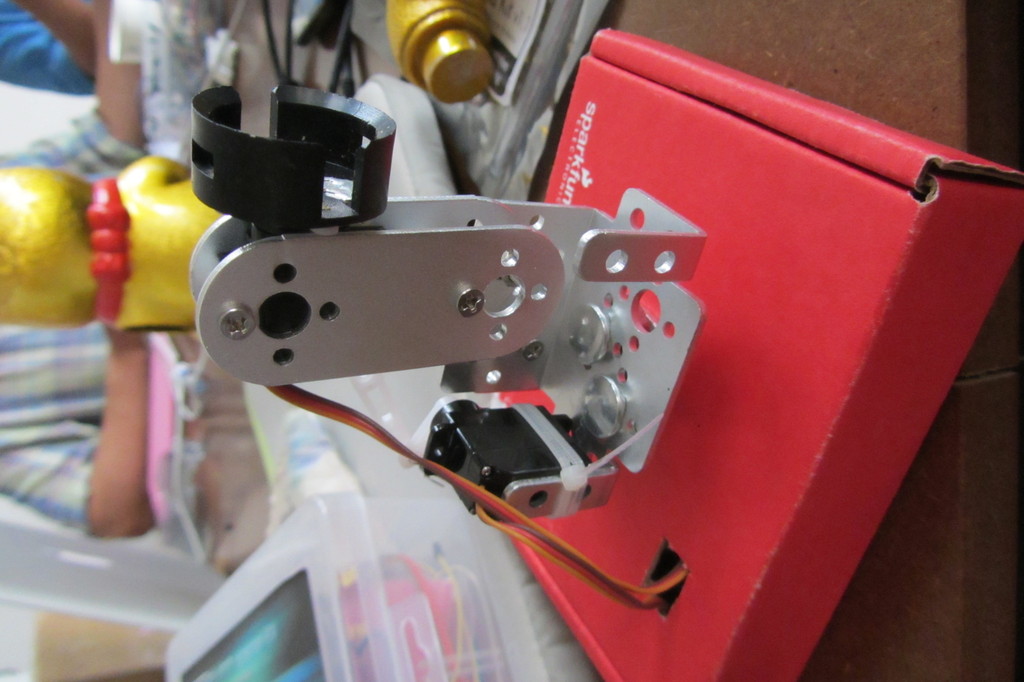
Step 4 - Making the cat's new innards
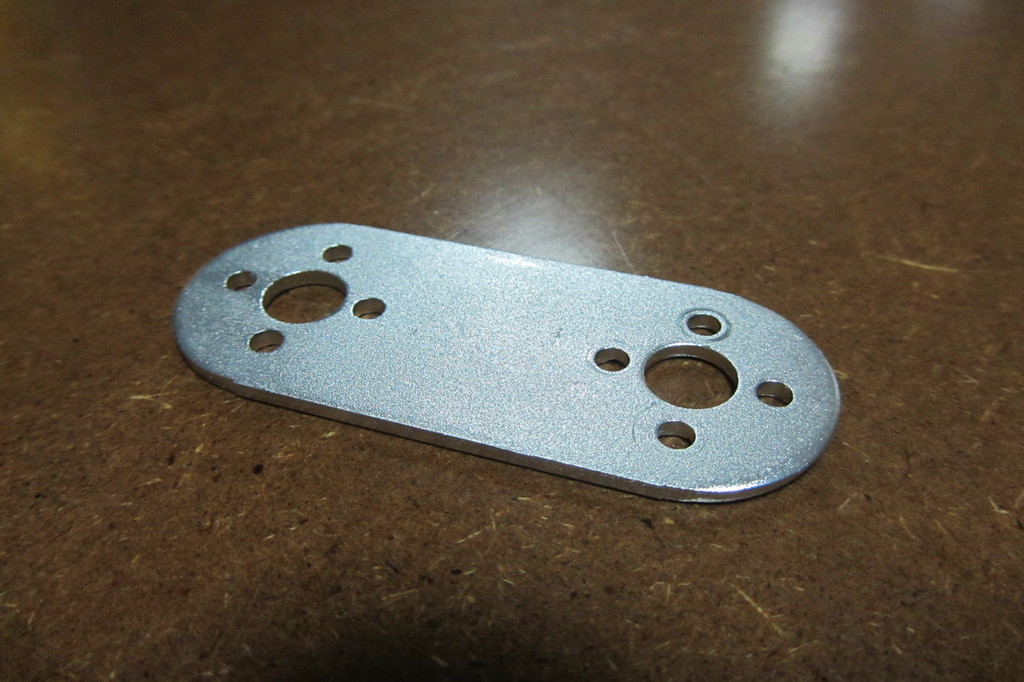
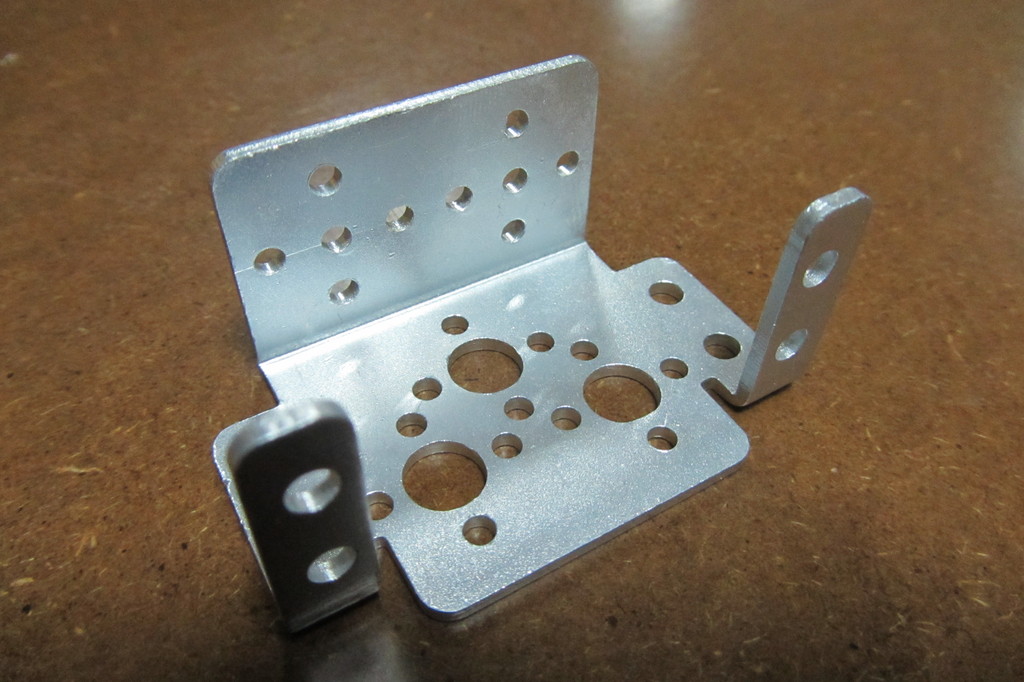
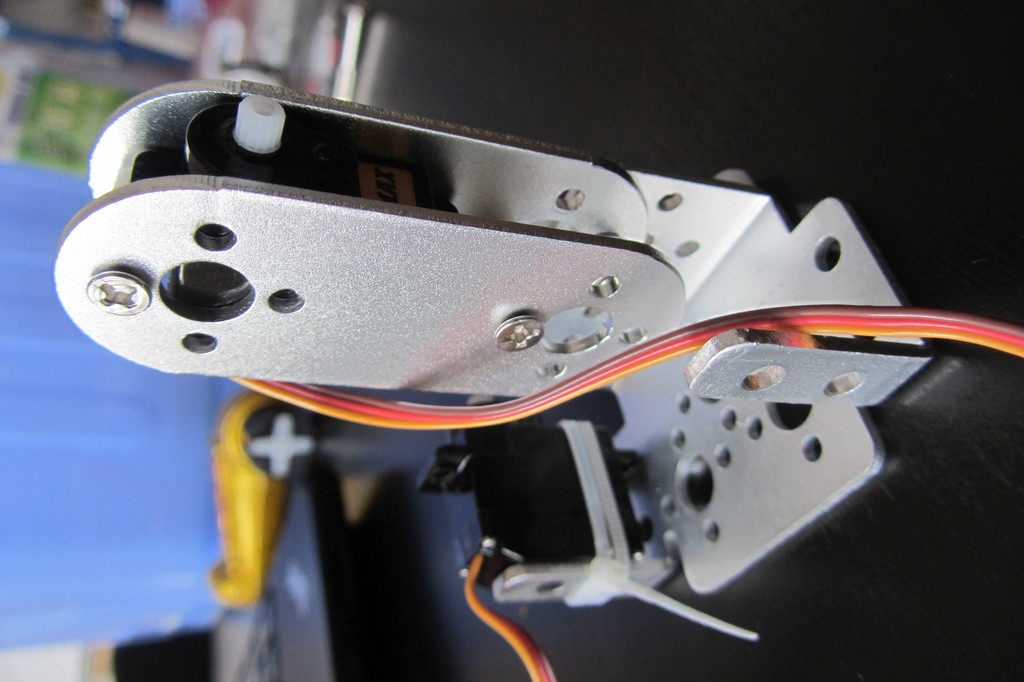
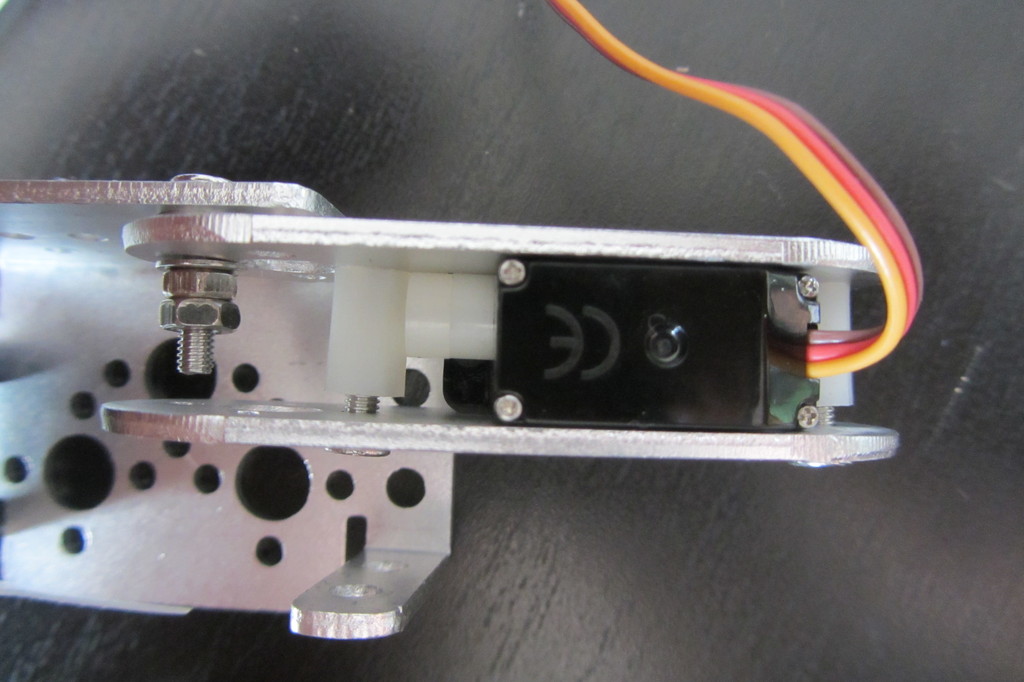
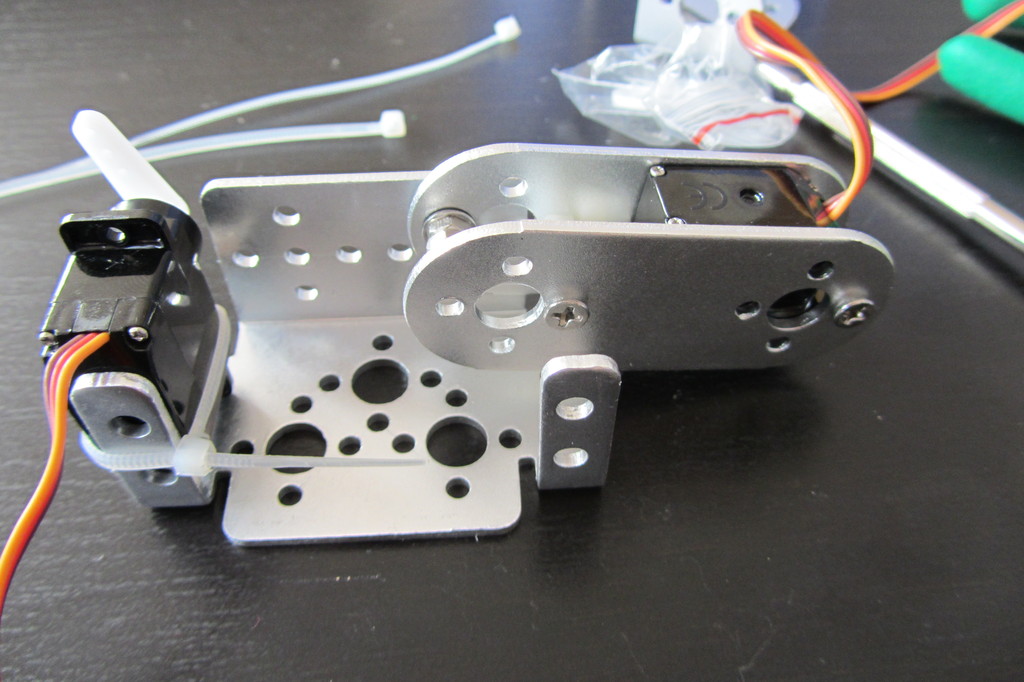
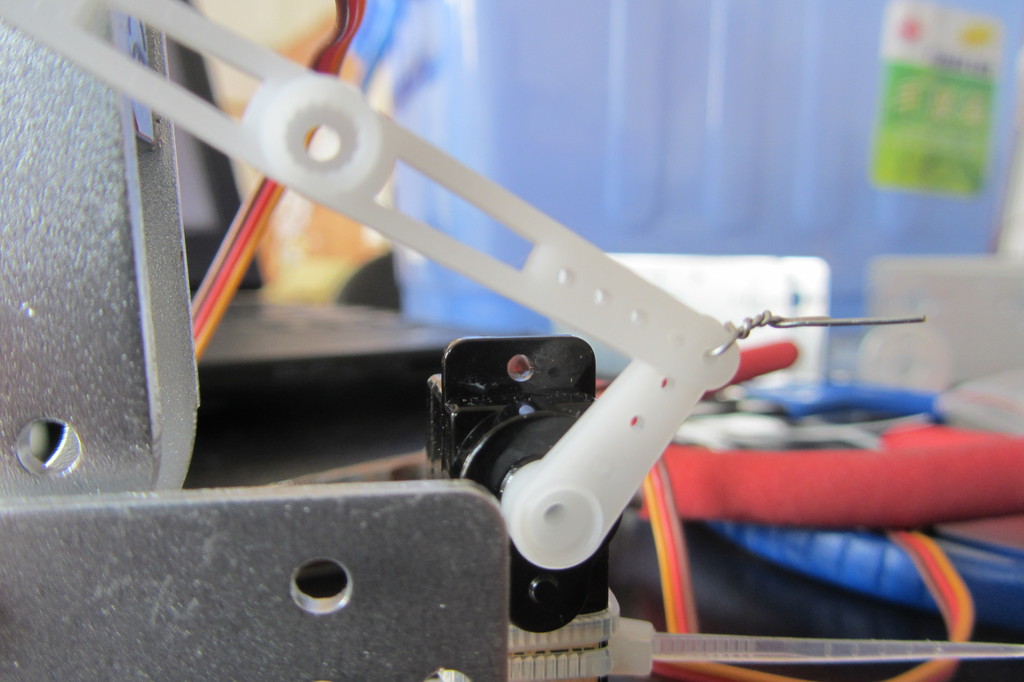
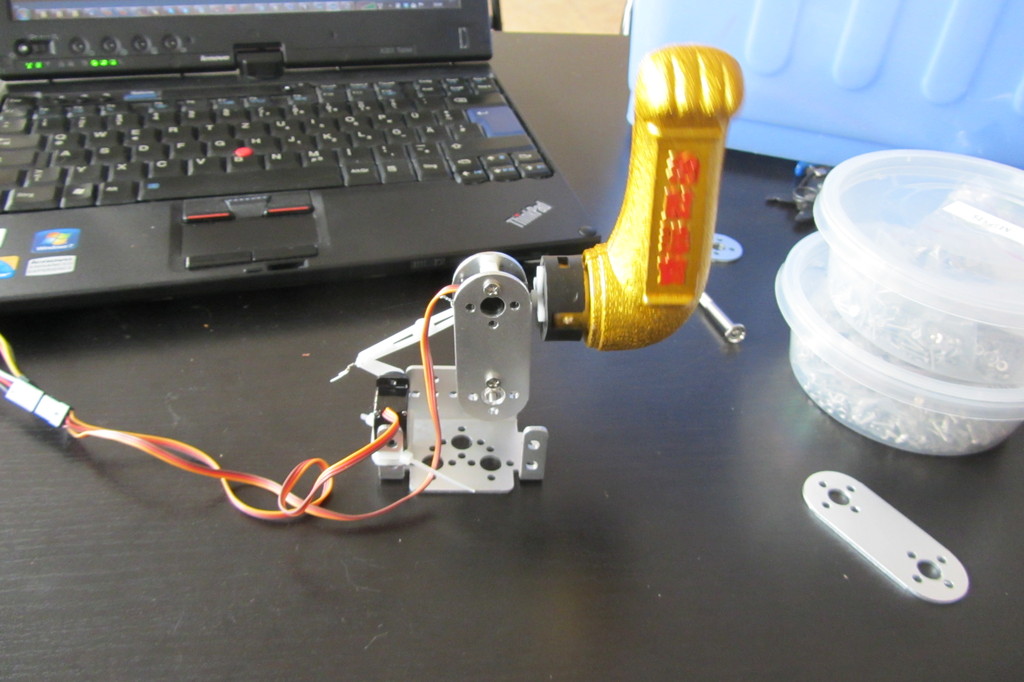
We had a few metal parts at the space, so with 3 of those parts (I guess it's aluminium), a bunch of screws, some zip ties, some metal wire, you can fix the two servos together to create the innards. It really depends on the parts you have to work with, but take a look at the pictures to see how we did it.
Step 5 - The Base
The first thought was to put the Arduino, the Base Shield and everything else inside the cat. Unforunately, there was not enough space. So we decided to use a small box as a base, which serves as a support for the inner metal thing, and houses the electronics stuff. The inner assembly is raised a little to make it all fit, using another one of the metal parts, which is bend 90° and then screwed to the box.

Step 6 - Writing the code
Having never worked with an Arduino (only worked with bare bones AVRs before), the first step for me was to download the Arduino IDE. I found an example for controlling servos with the arduino online, and put together a short Arduino sketch, which you can find in the projects GitHub repository.
Additions
The Base shields still has a lot of space left. And thanks to Seeed Studio, we had a bunch of stuff to work with.
The Sound Recorder
First idea was to make the cat actually sound like a cat. There is a Stem sound recorder we got. Unfortunately, it's sound quality was really bad. Maybe a Wave shield would be better.
Buzzer
Since we still wanted some noise out of the cat, we took the buzzer and put it in there. Every once in a while, it just beeps for no apparent reason.
Motion Sensor
The cat has some sort of neckless, which would be perfect to put the Motion Sensor Stem in there. You would need to drill into the cat and fix it from the inside. Wouldn't it be cool if the cat would just move in weird ways if someone's standing right in front of it?
Thanks
I wanted to thank a few people who helped me make this project possible: Thomas Bitterle, Ricky Ng-Adam, Min Lin Hsieh, Paul Adams, Scott Ballantyne, my mum and dad, and everyone I know ;)